Get Started
Getting started
This page is designed to be your compass, leading you through the foundational steps of building with Singlebase.
Create account
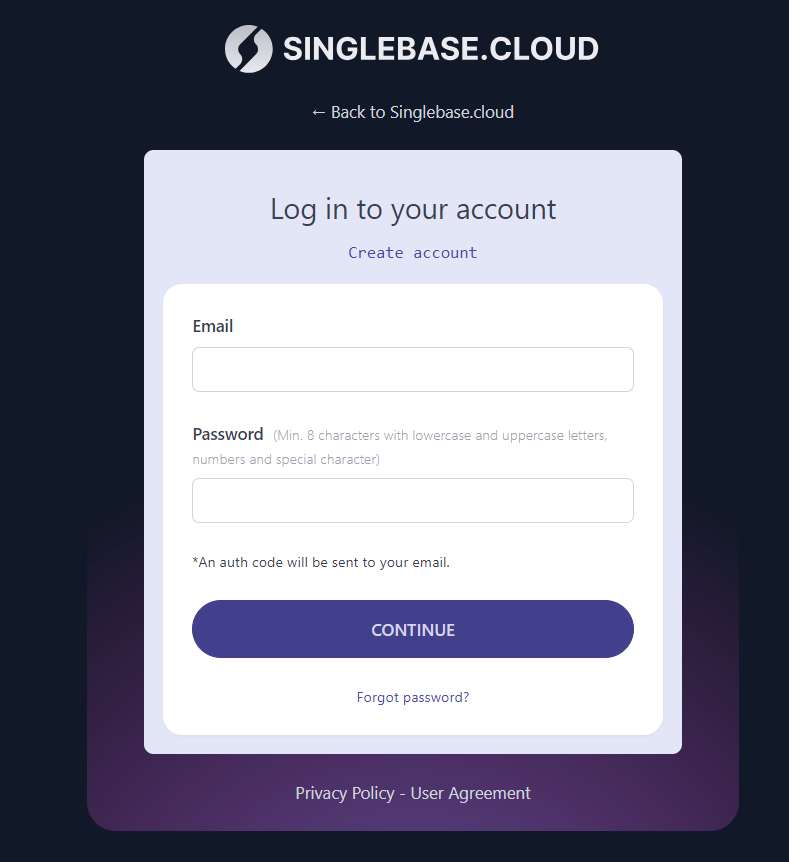
To get started with Singlebase, you must create an account. Go to console.singlebasecloud.com to create an account for free.
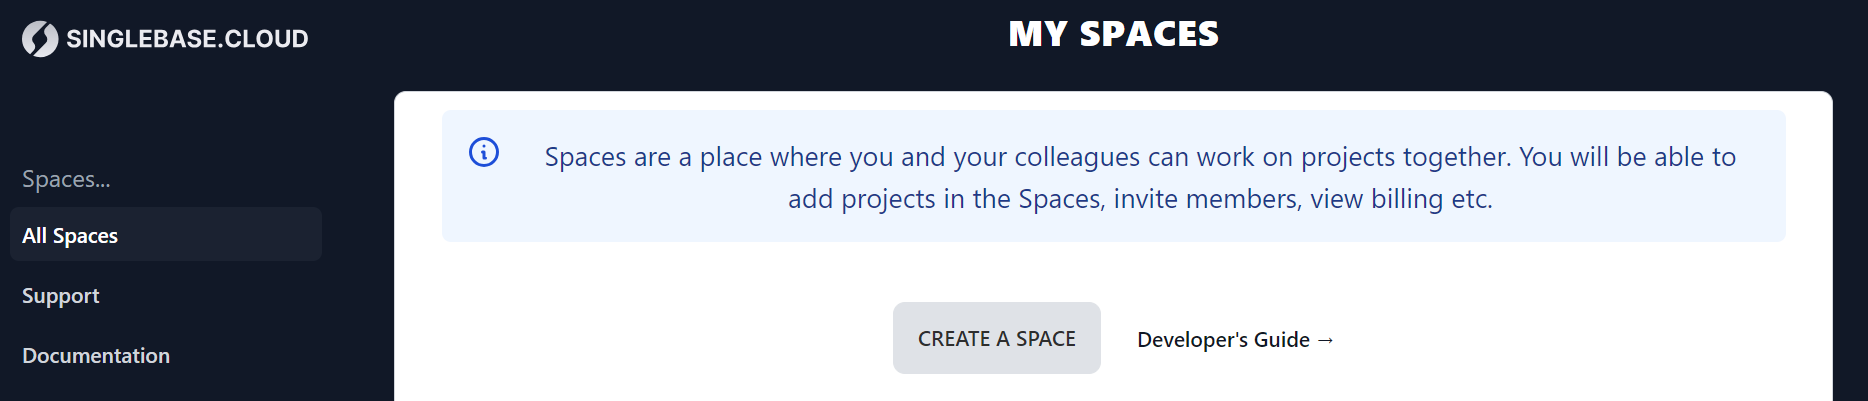
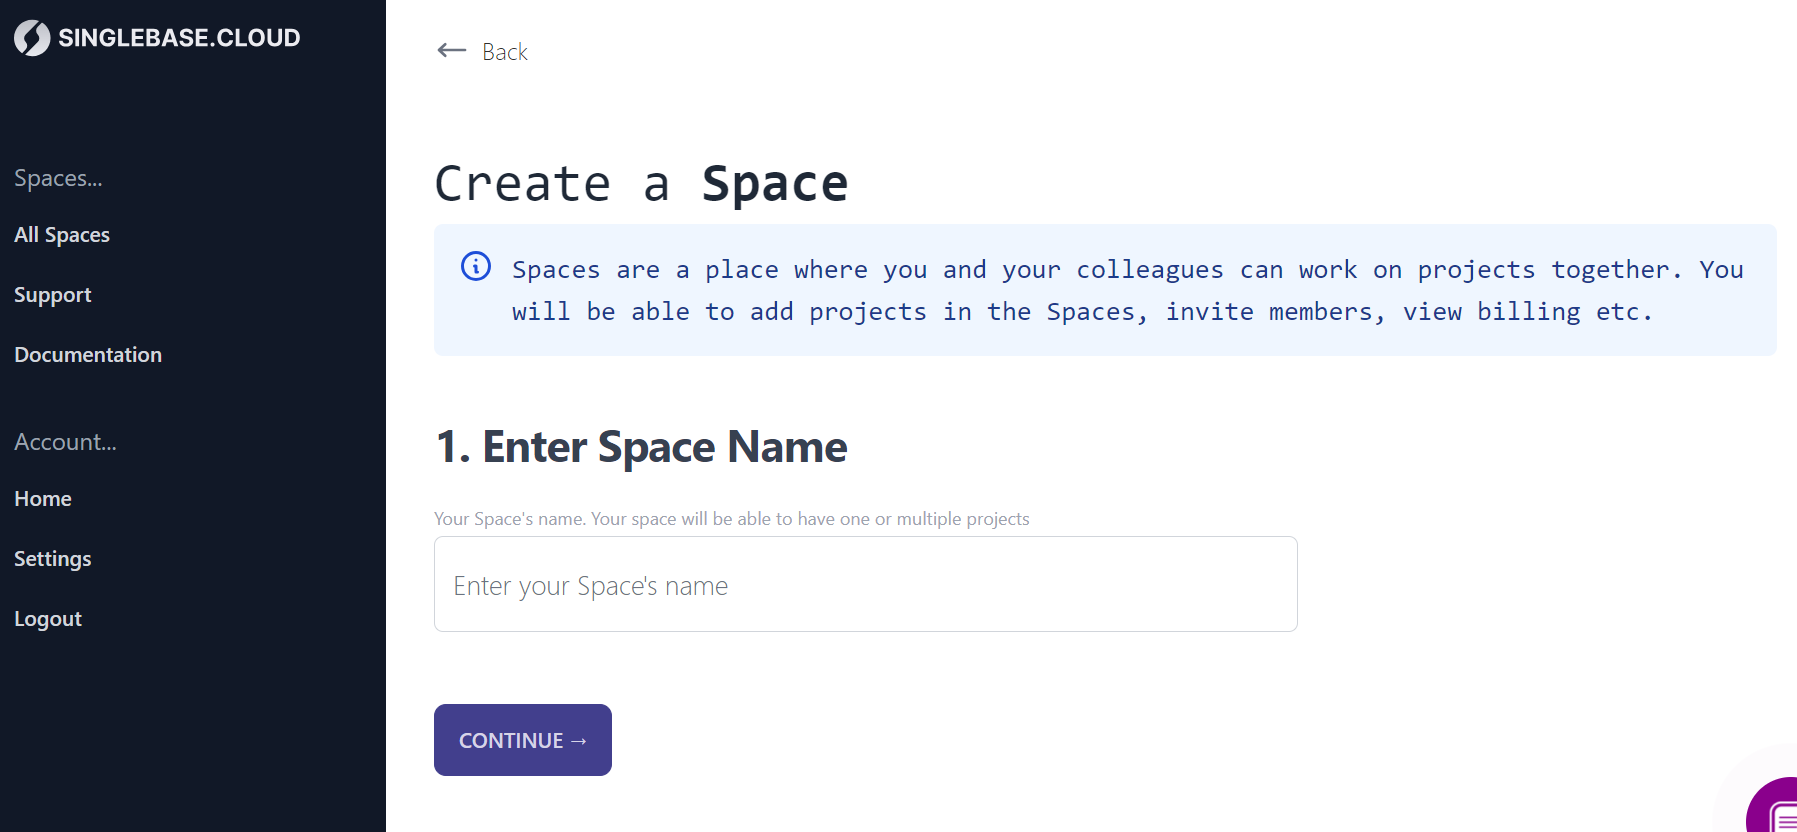
Create a space
Spaces are a collaborative environment for you and your colleagues to collectively work on projects together. You will be able to add projects in your Space, invite team members, assign project permissions to team members, view billing, etc.
Follow these short steps to create a Space:
- Login to your Singlebase App Console
- Inside the console, navigate into All Spaces and select CREATE A SPACE
- Enter Space name
Create a project
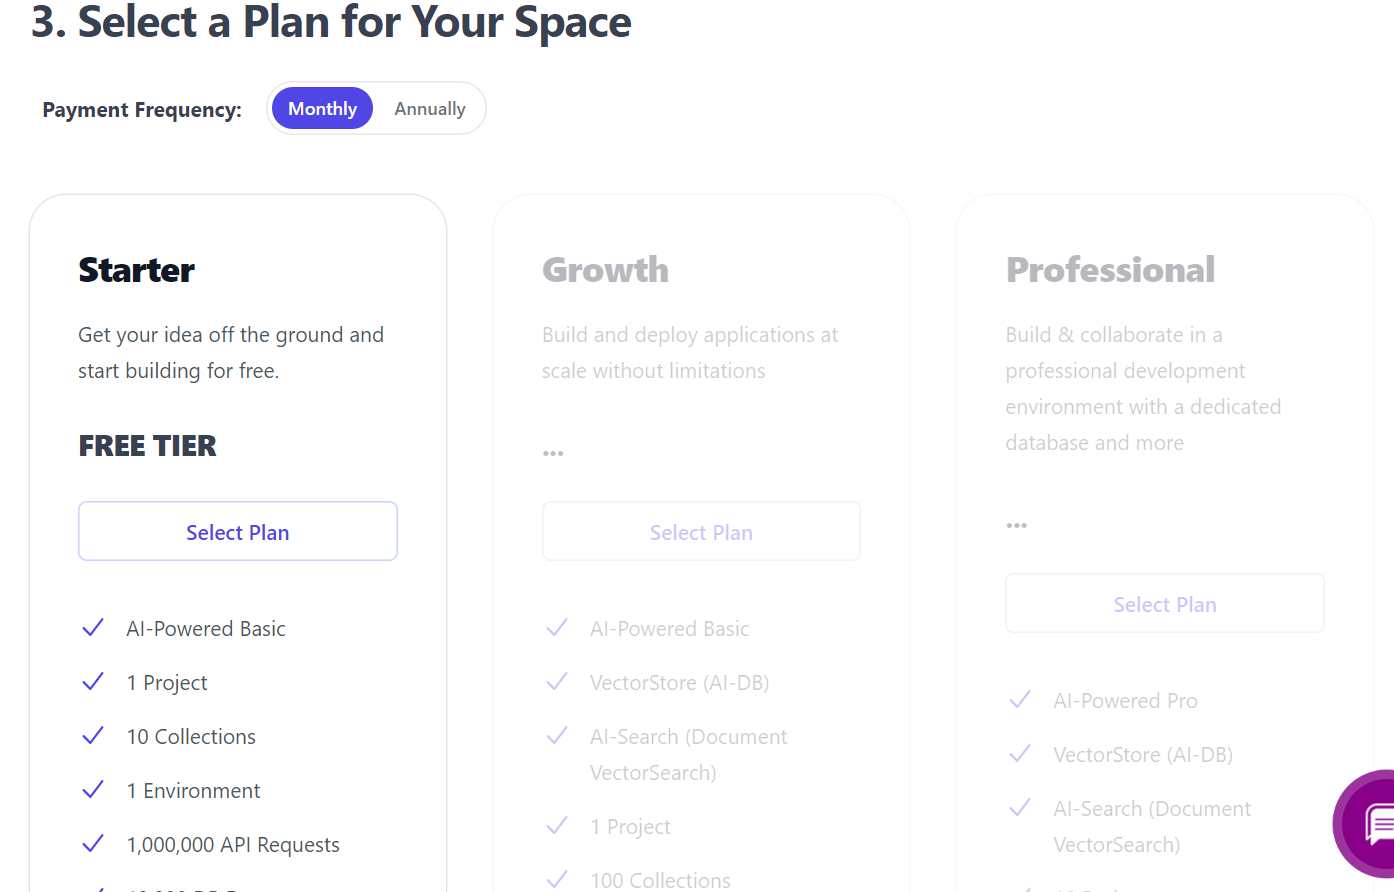
Following the input of your Space name, Singlebase allows you to create a new project within your Space - ideally your first project. You can create additional projects within your Space at any time, contingent on your plan.
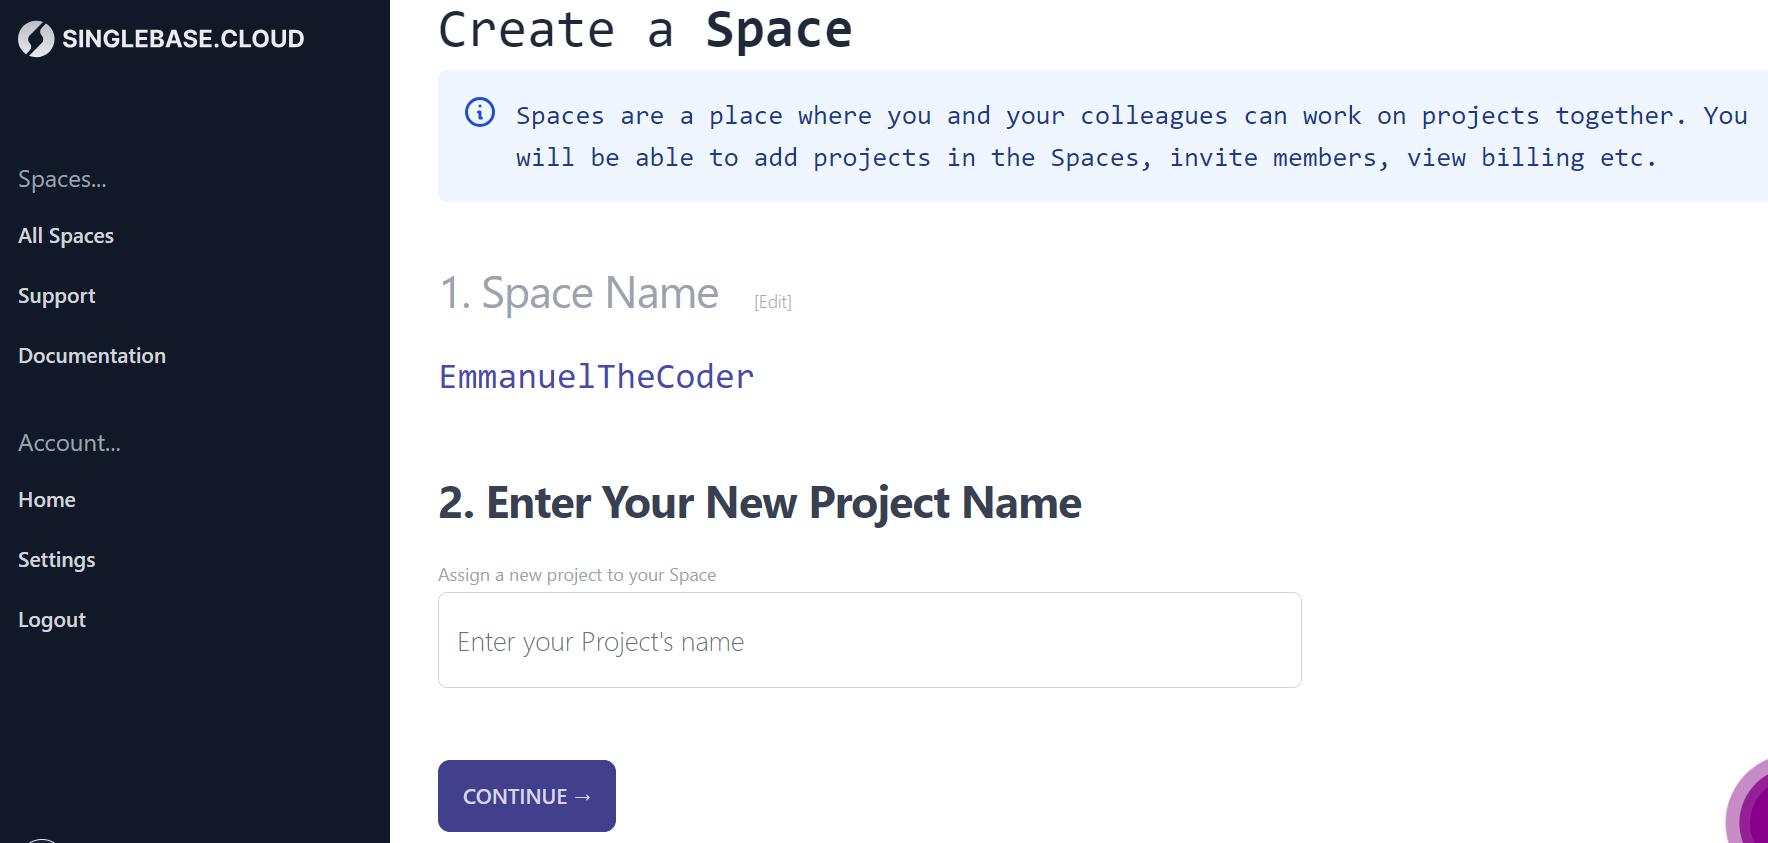
The next step after creating a project is to select the plan that is best for what you are building. Singlebase has a generous free plan to help get your idea off the ground and start building.
Get API keys
API access is disabled by default. Singlebase doesn’t force its features on you. It allows you to use just the features that you want. You have to enable API access to use the API keys. If API access is disabled, request to the endpoint will return a 503 error.
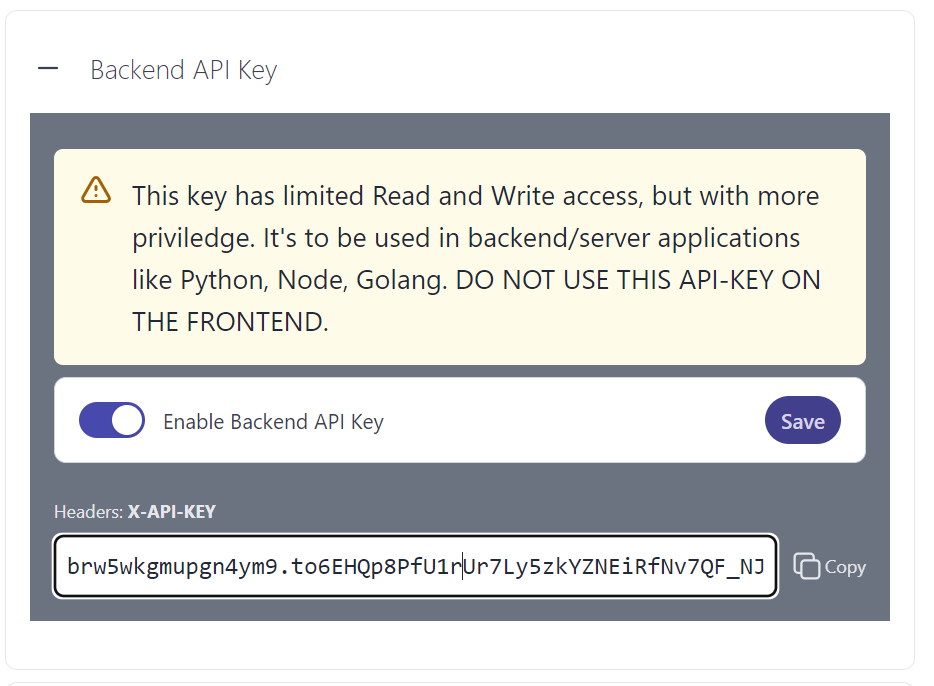
There are 3 API keys in Singlebase:
- Frontend API Key: The Frontend API Key should be used only on the frontend. It typically provides limited access to the service.

- Backend API Key: The Backend API Key has more privileges and should be used only in the backend. A typical use case for this API is for extending your app’s functionality by writing custom backend code.
- Admin Private Access Key: The Admin Key gives full access to the service. Use this key only when necessary and only on the server side . Do not expose or share this key with anyone.
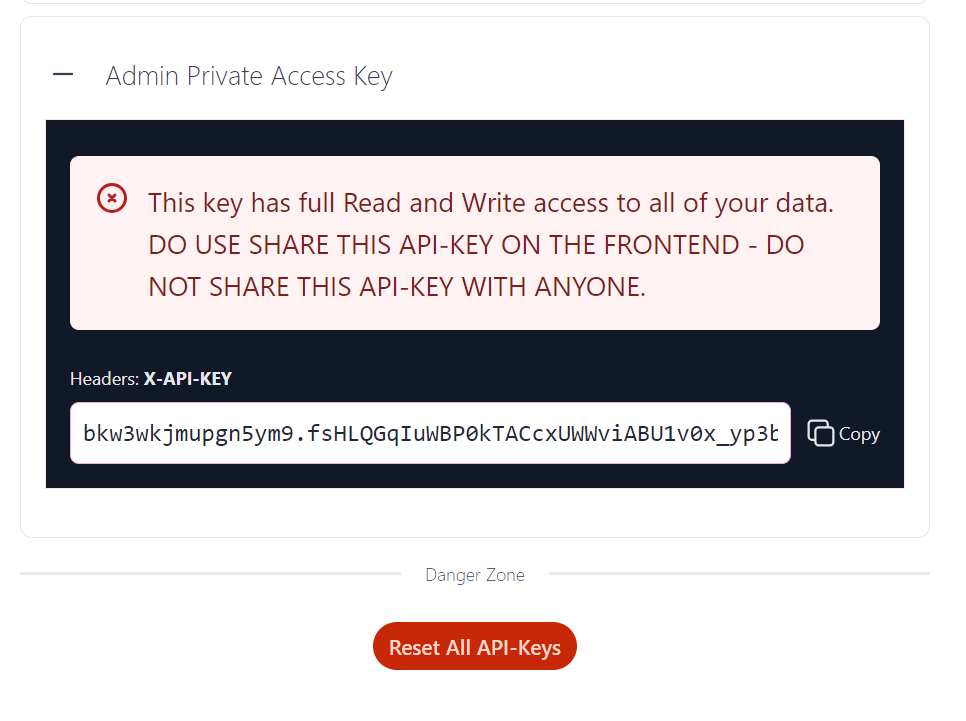
If you feel any of your API keys is compromised, you can always reset all API keys inside the Singlebase console.
Do not forget to click Save after making any changes.
Setup permissions
Singlebase allows you to assign privileges to your database. Choose who can read and write documents into your datastore.
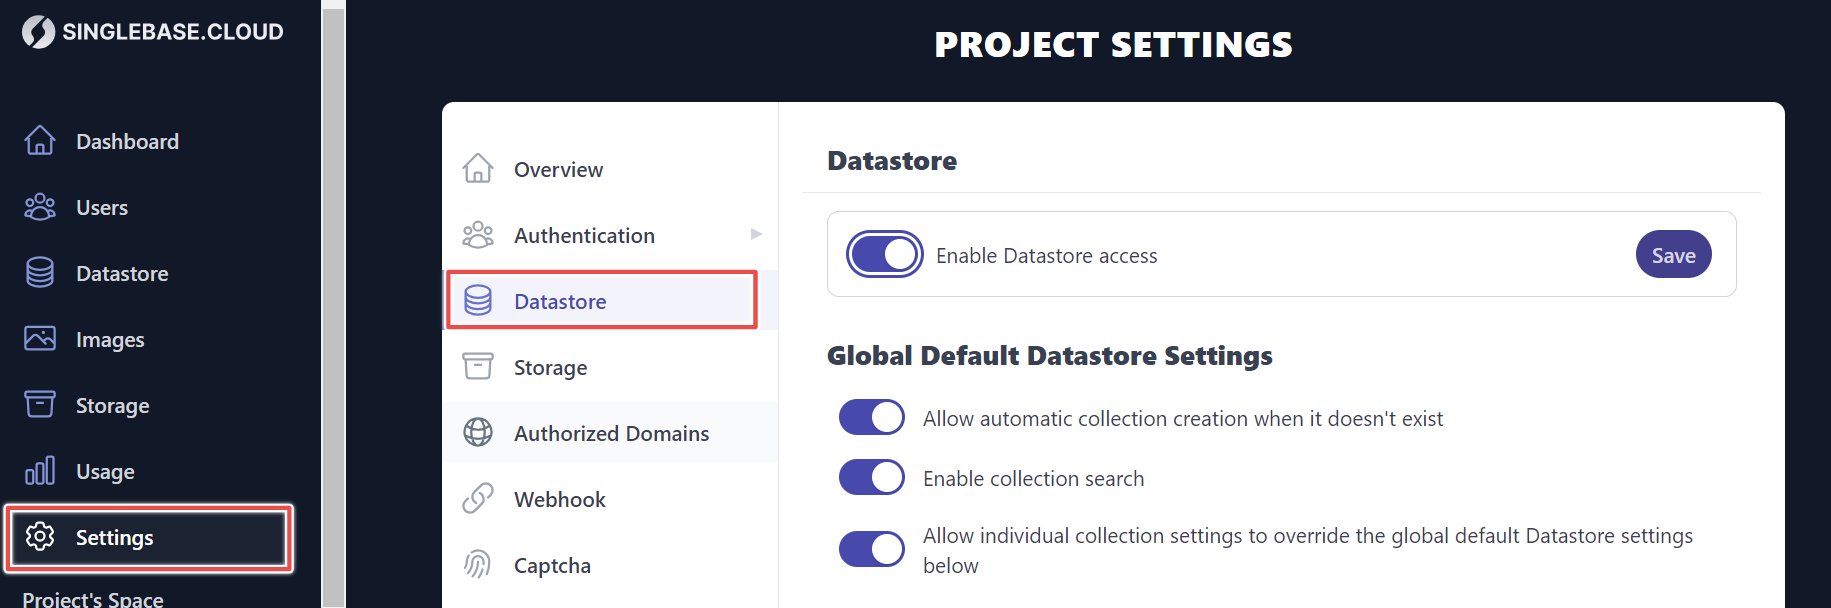
Datastore
As with all other Singlebase features, Datastore access is disabled by default. You need to enable access and set global datastore settings to your preferences:
- Allow automatic collection creation when it doesn’t exist: Enabling this setting will allow collections to be automatically created if the collection name in your API request doesn’t exist in the datastore.
- Enable collection search: Collection search allows you to search for documents in your collection.
- Allow individual collection settings to override the global default datastore settings: Enabling this means that the individual collection settings will override the global settings. Singlebase allows you to configure individual collections in your datastore. For example, you may allow auth only read access in the Todos collection, and allow admin only read access permission in your global settings. In this case, the permissions assigned for the Todo collection will take precedence for that collection.
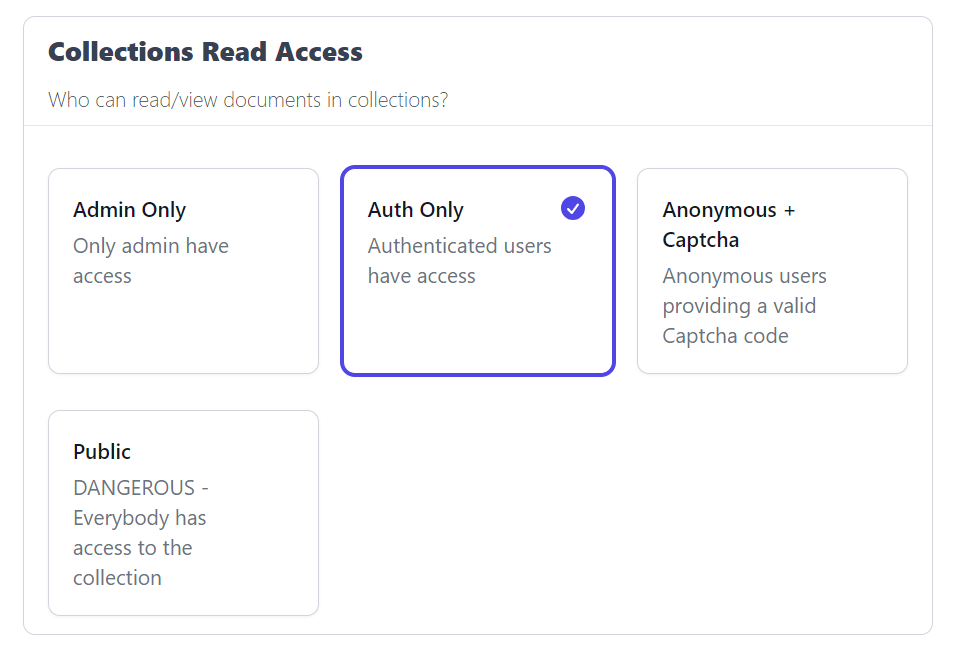
- Collections Read Access: Select who can read documents in collections.
- Collections Write Access: Select who can write documents in collections

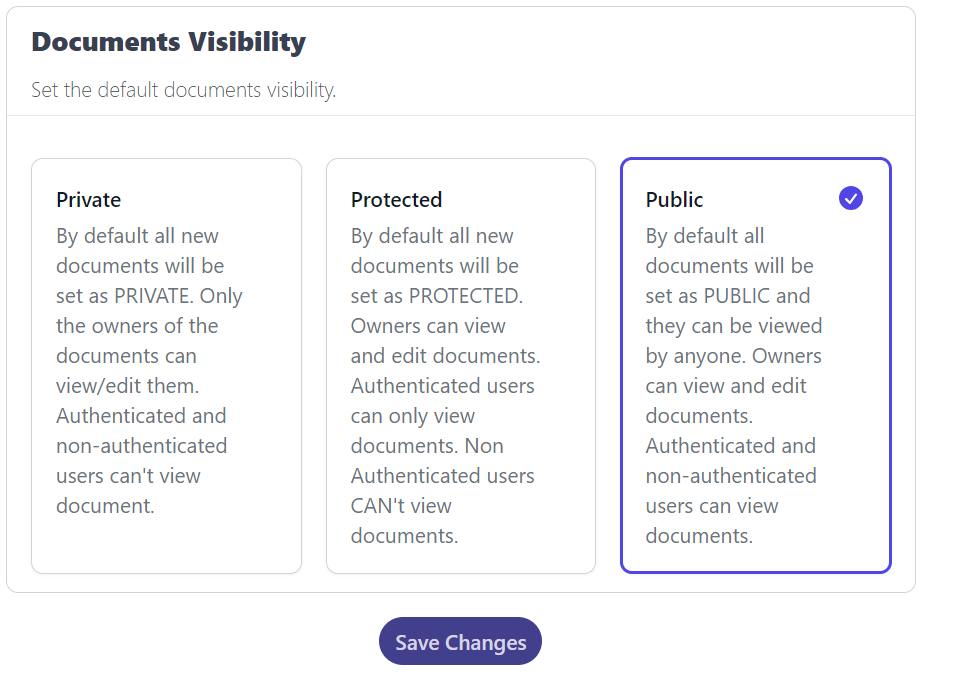
- Document Visibility: Select you can view and edit a document.
Authentication
Go to Settings > Authentication and select Enable Authentication
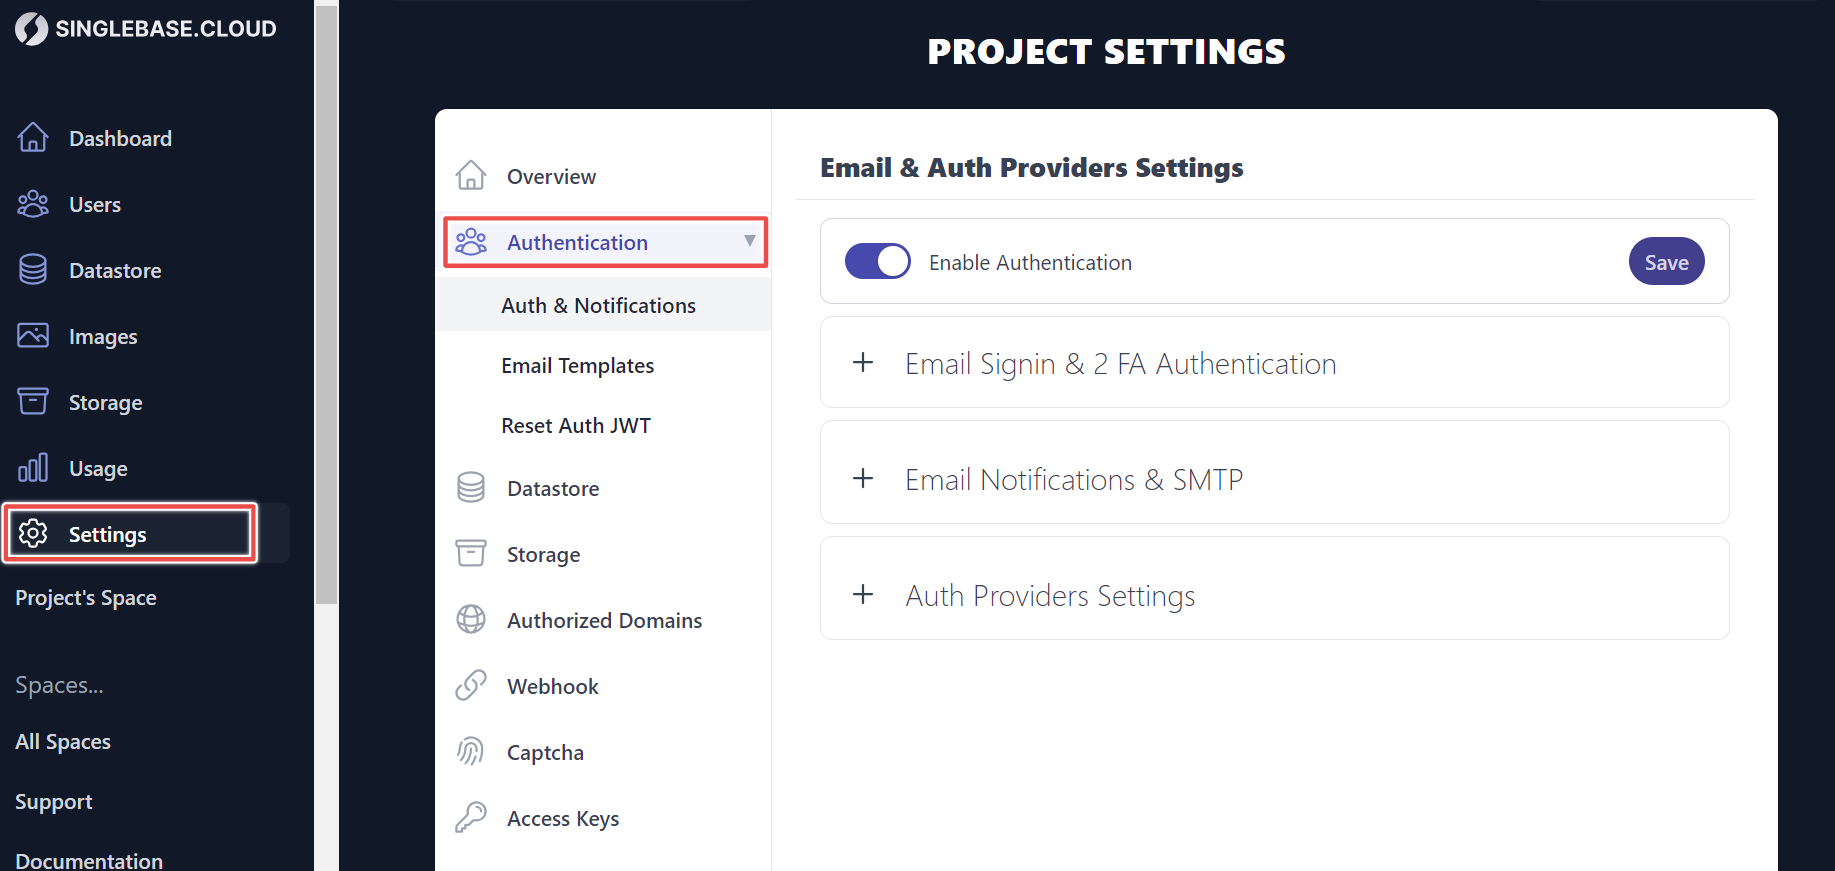
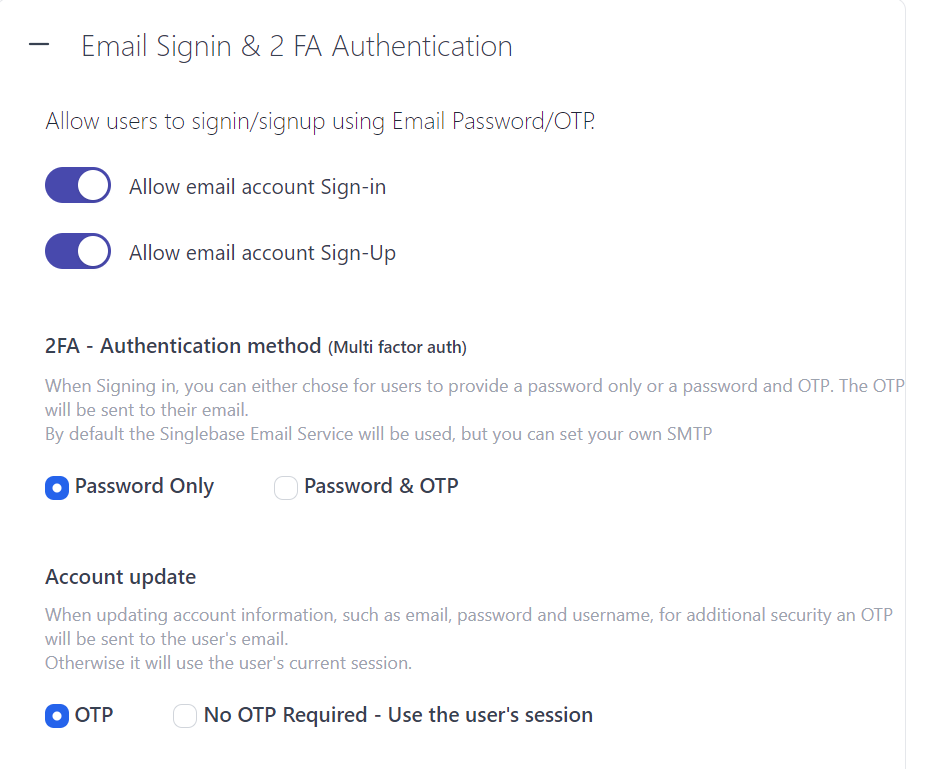
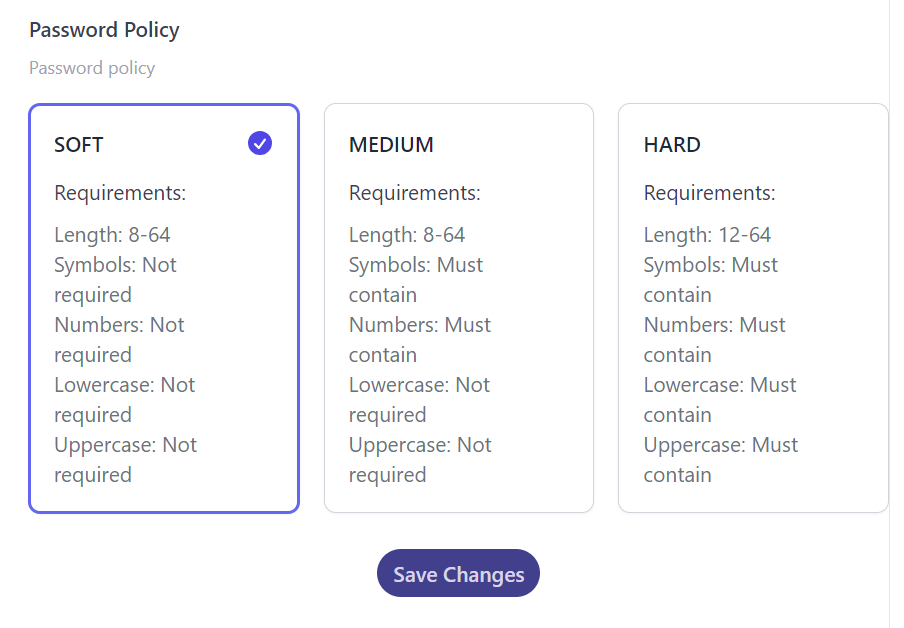
- Email Signin & Two-Factor Authentication: Choose how you want users to sign-in and sign-up. Select your preferred authentication method (Password Only or Password & OTP) and select your preferred password policy.
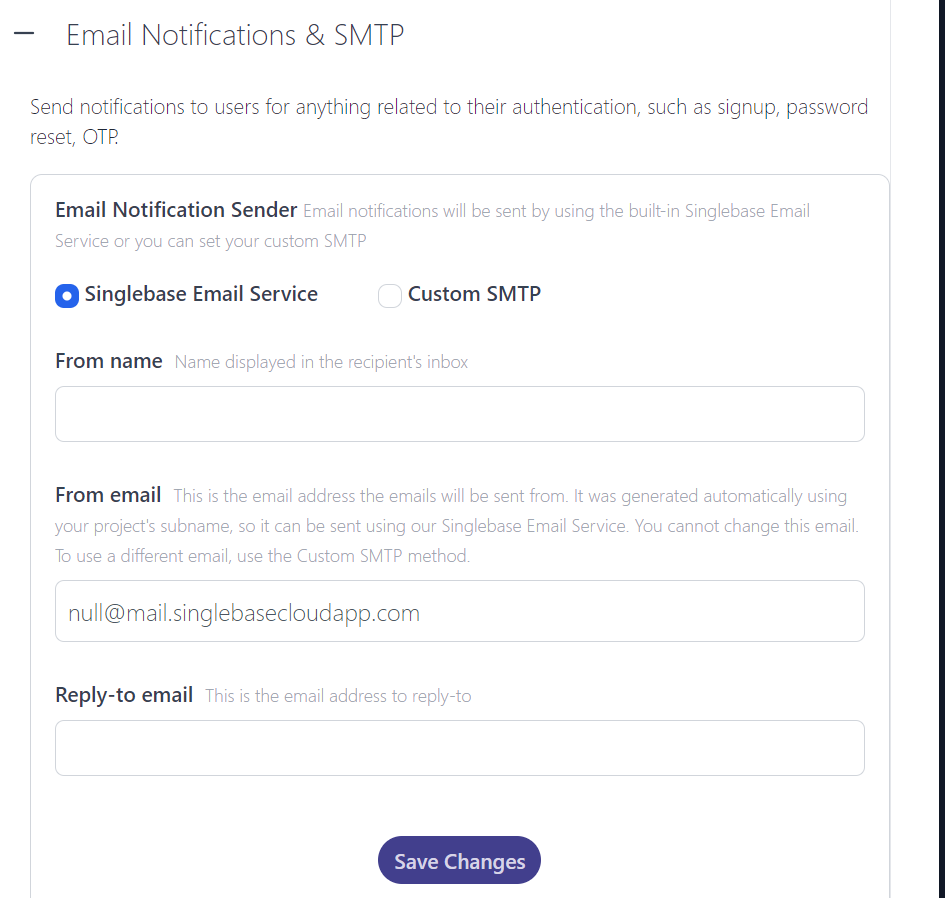
- Email Notifications & SMTP: By default, the built-in Singlebase Email Service will be used to send emails. You can customize the email template or set up your custom SMTP.
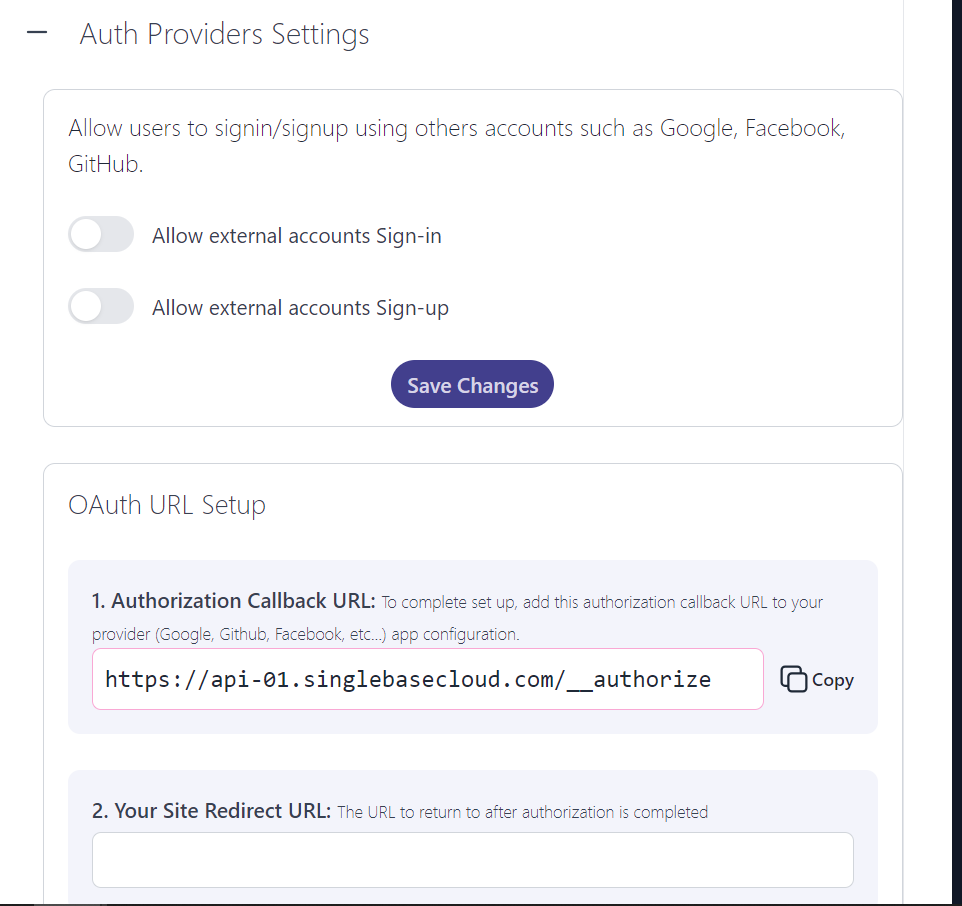
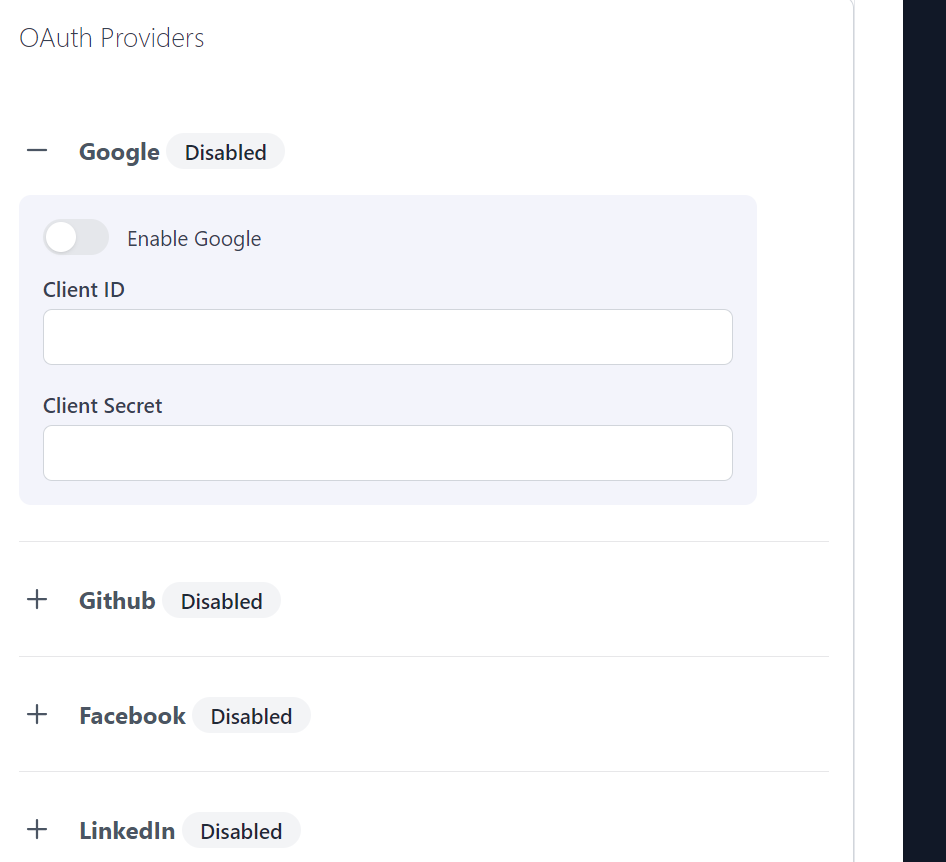
- Auth Providers Settings: Enable the Auth Providers Settings to allow users to sign-in and sign-up on your application using third-party applications like Google, GitHub, Facebook, etc.
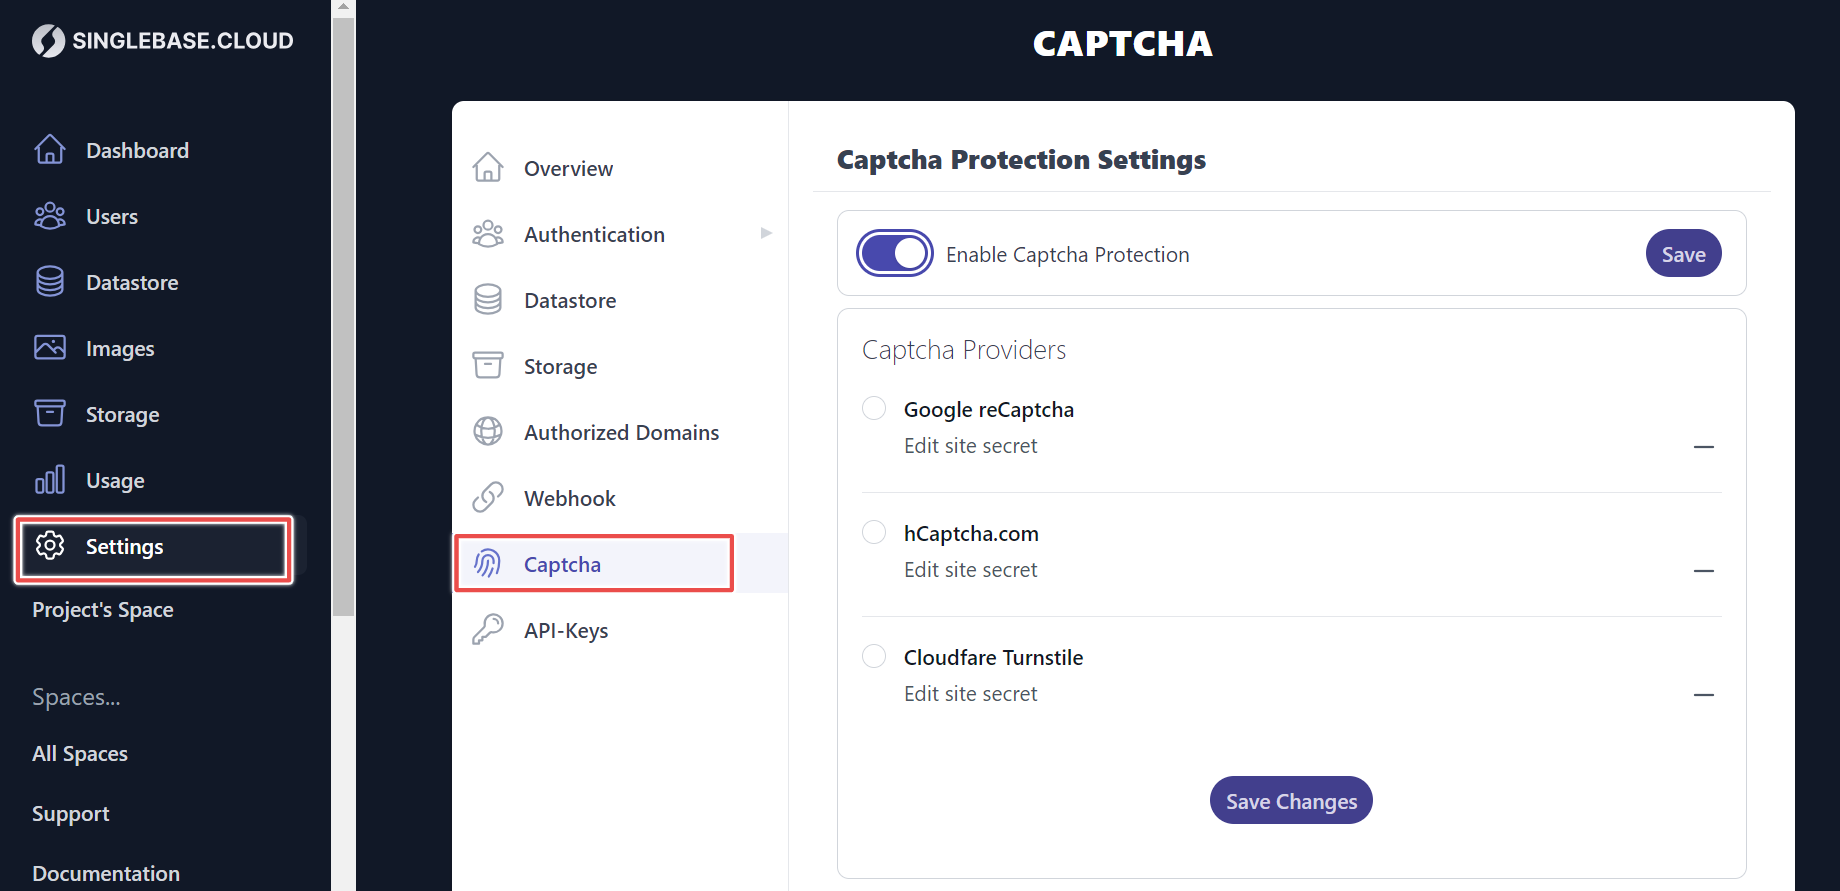
CHAPTCHA
You can enable CAPTCHA protection for your application. Choose from the available CAPTCHA providers.
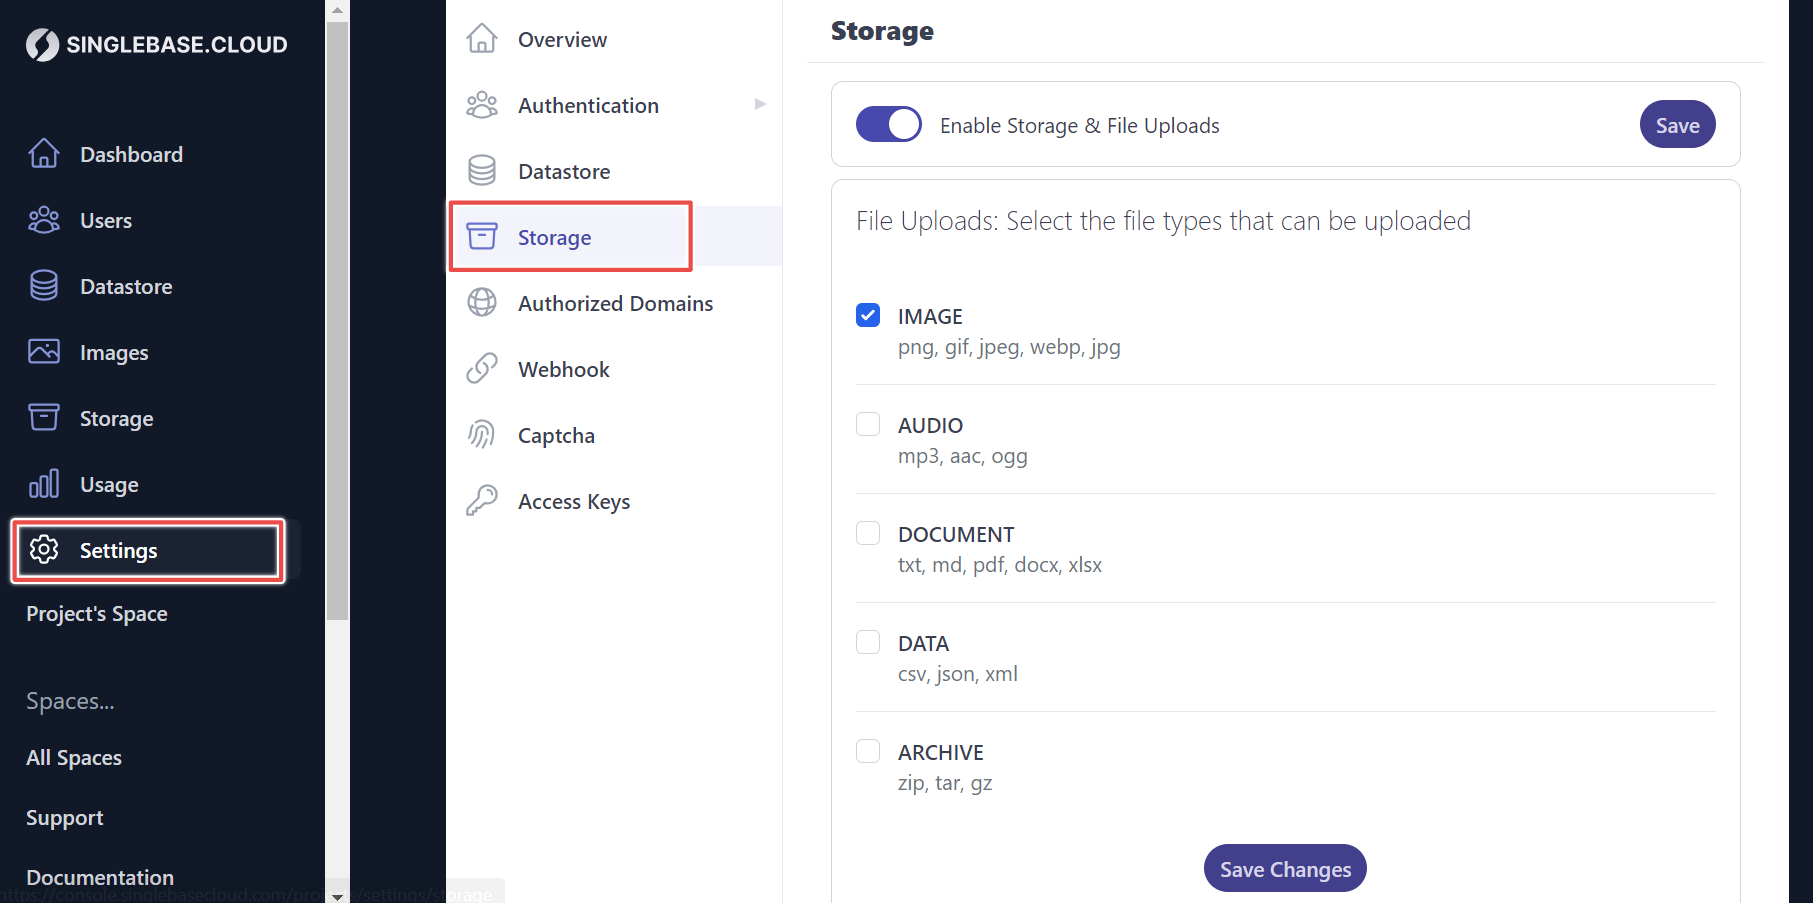
Storage
Enable storage and select the file types that can be uploaded.
Note: Image is the only file type that Singlebase free tier customers can select.
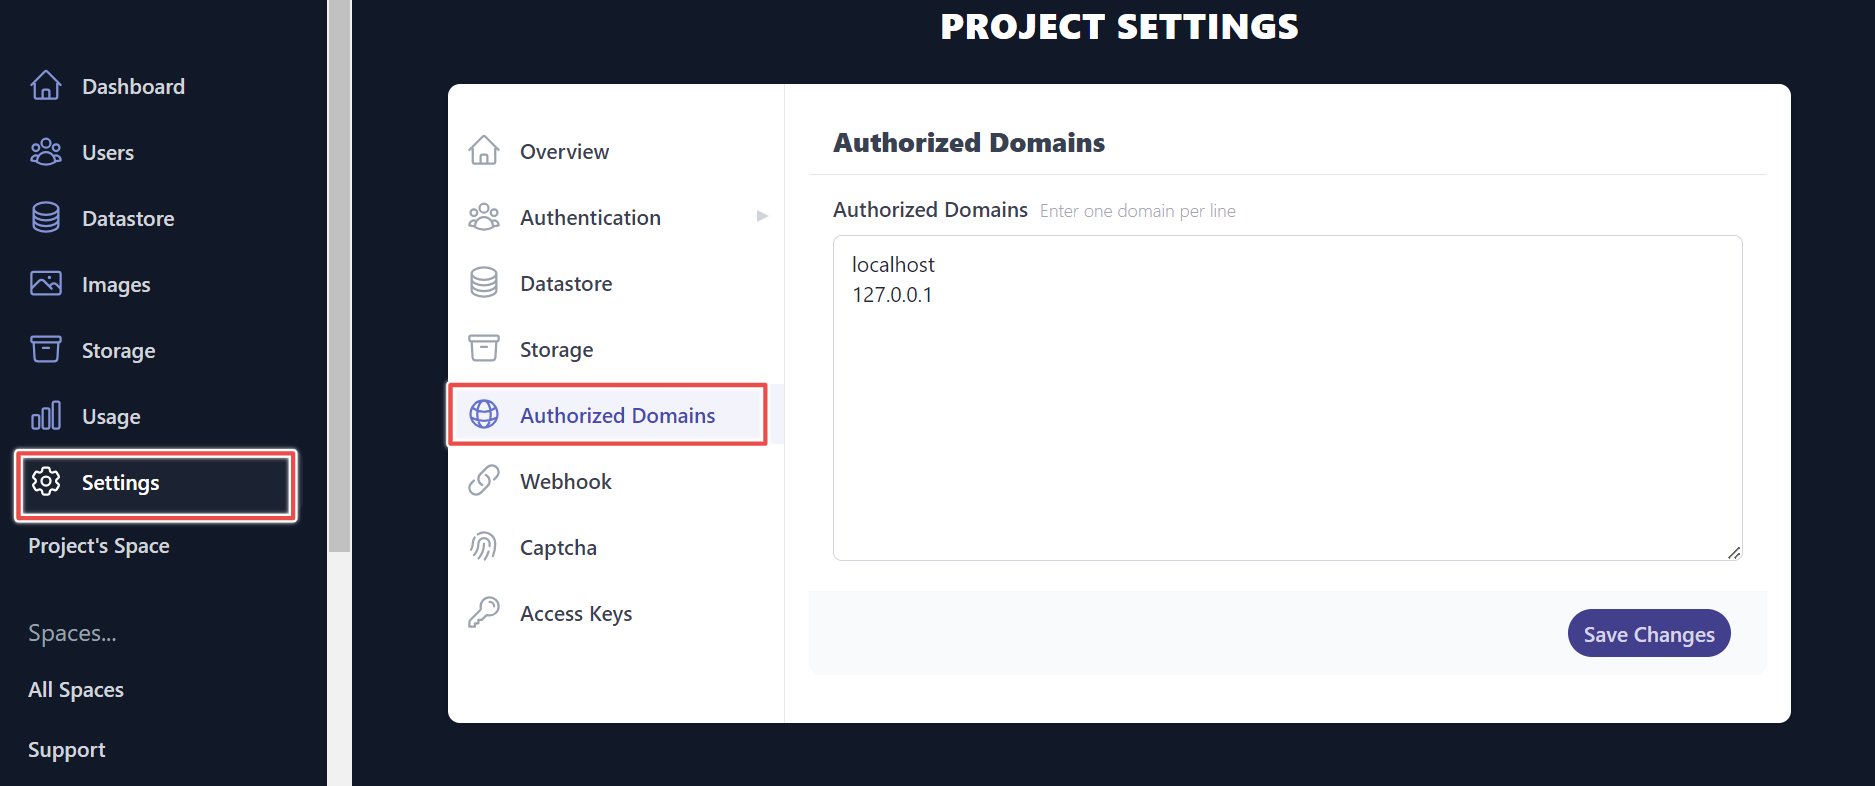
Authorized domains
To keep your application secured, Singlebase allows you to specify the authorized domain that is allowed to access resources in your database. Requests from unknown domains will be declined.
Webhooks
Receive real-time data via webhooks.

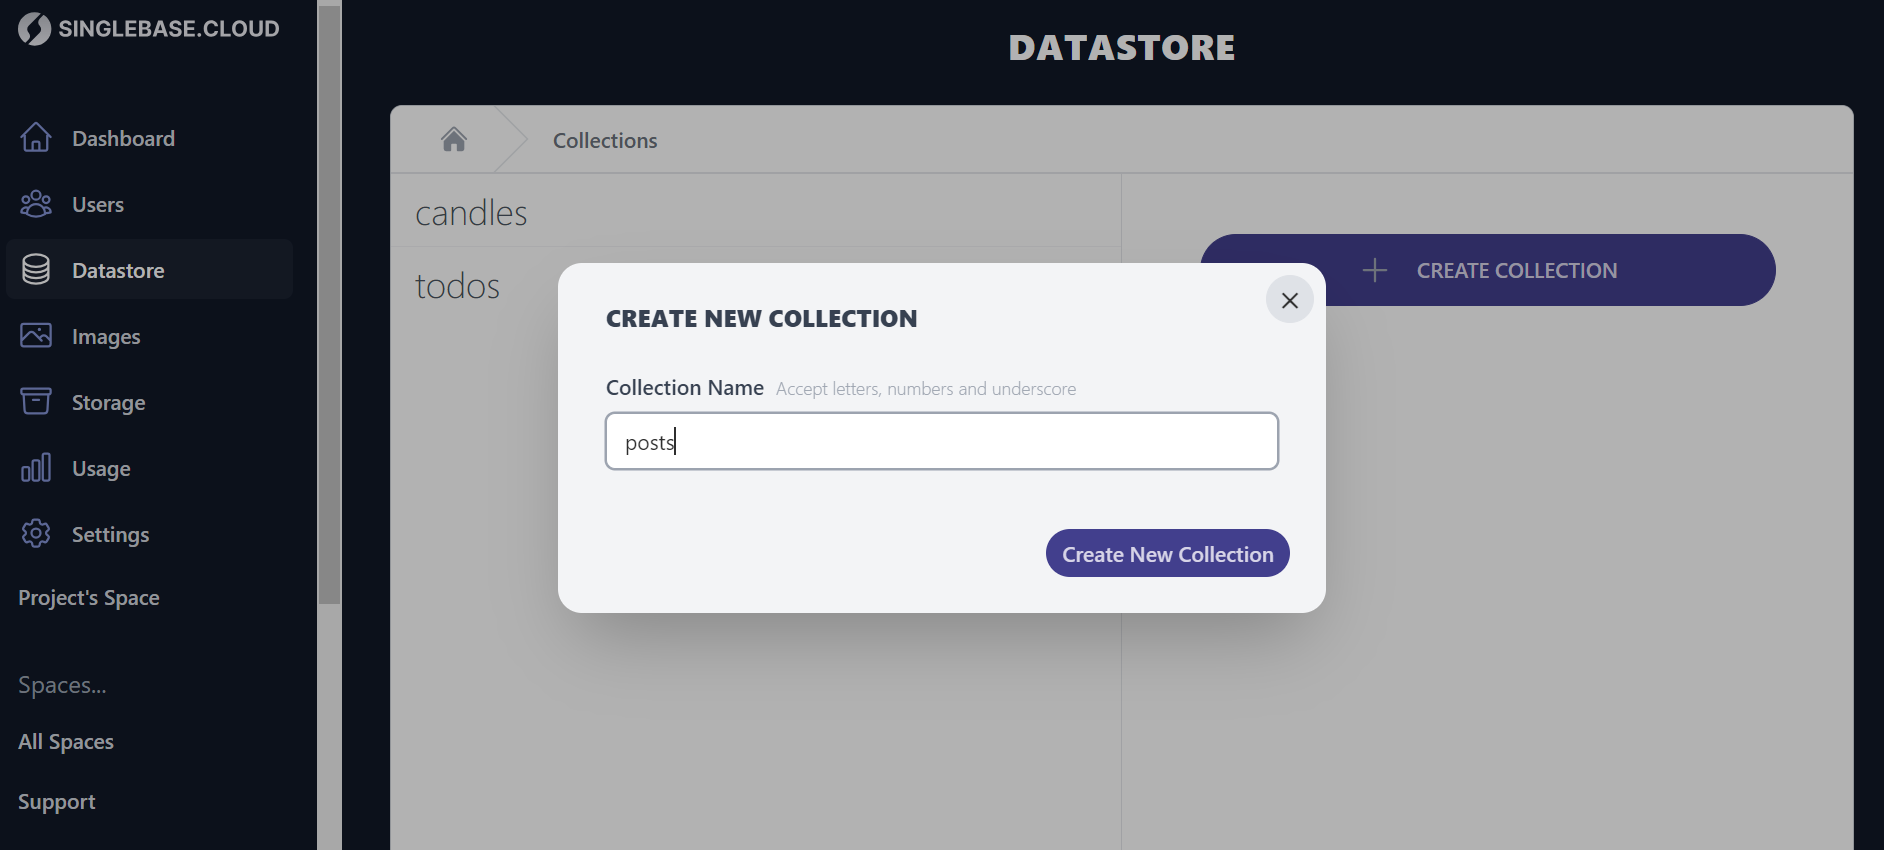
Create a Collection
Navigate into Datastore > select Create Collection and enter collection name to create a new collection.
Singlebase SDK
The Singlebase SDKs expose a standard interface for datastore, authentication and storage services.
Run the following command in your terminal to install the JavaScript and Python SDKs
JavaScript:
#for npm
npm install @singlebase/singlebase-js

#for Yarn

yarn add @singlebase/singlebase-js
Python:
pip install singlebasecloud